Views: 0 Author: D and D Hardware Publish Time: 2025-10-27 Origin: D and D Hardware


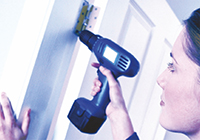
Does your door slam shut like a thunderclap? Or does it drag so slowly that you're left standing there waiting? An overhead UL door closer that's out of adjustment can be frustrating, but the good news is that fixing it doesn't require a professional. With a few basic tools and about 15 minutes, you can fine-tune your door closer to work perfectly.
This guide will walk you through how to adjust an overhead UL door closer, covering everything from identifying the adjustment screws to troubleshooting common issues. By the end, you'll have a door that closes smoothly and securely every time.
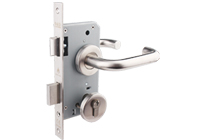
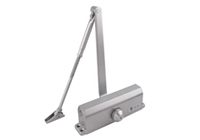
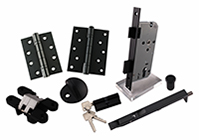
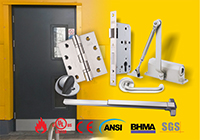
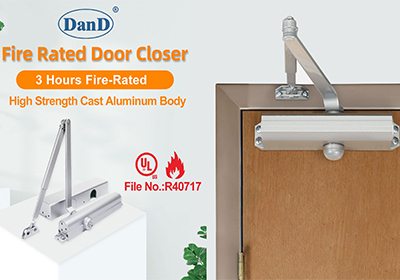
Before we dive into adjustments, let's clarify what we're working with. A UL door closer is a mechanical device installed at the top of a door that controls how the door closes. The "UL" stands for Underwriters Laboratories, meaning the closer meets specific safety and performance standards. These closers are commonly found on commercial doors, fire doors, and residential entry doors where controlled closing is important for security or fire safety.

Most overhead UL door closers use hydraulic fluid to regulate the closing speed and force. They typically have adjustment valves that let you control two main functions: the sweep speed (how fast the door closes from open to about 10 degrees) and the latch speed (the final push that gets the door to close completely).

Adjusting a UL door closer doesn't require a toolbox full of equipment. Here's what you'll need:
· A flathead or Phillips screwdriver (depending on your closer model)
· A step ladder (if the door is tall)
· A clean cloth (to wipe away any dirt around the adjustment screws)
That's it. No special tools or expertise required.
Most overhead UL door closers have two adjustment valves on the body of the closer. They're usually small screws or valves located on the side or bottom of the unit. These valves control:
· Sweep valve: Controls the main closing speed
· Latch valve: Controls the final closing speed (the last few degrees before the door latches)
Some models may also have a backcheck valve, which prevents the door from opening too forcefully and damaging the wall or closer.
Take a moment to locate these valves on your specific closer. If you're unsure, check the manufacturer's documentation or look for markings on the closer body that indicate "S" for sweep and "L" for latch.
Before making any adjustments, open the door fully and observe how it closes. Pay attention to:
· Does it close too quickly or too slowly?
· Does it fail to latch properly?
· Does it slam at the end?
This baseline will help you determine which valve needs adjustment. If the door closes too fast throughout, you'll need to adjust the sweep valve. If it closes well but doesn't quite latch, the latch valve needs tweaking.
The sweep speed controls how fast the door closes from fully open to about 10 degrees before it latches. Here's how to adjust it:
1.Locate the sweep valve (often marked with an "S")
2.Turn the valve clockwise to slow down the closing speed
3.Turn the valve counterclockwise to speed it up
4.Make small adjustments—quarter turns at a time
5.Test the door after each adjustment
Important: Don't over-tighten the valve. Turning it too far can damage the closer or cause hydraulic fluid to leak. If you encounter resistance, stop turning immediately.
Most doors should take about 5-7 seconds to close from 90 degrees to the latch position. Adjust until you achieve a smooth, controlled close.
Once you're happy with the sweep speed, move on to the latch speed. This controls the final closing action that pulls the door into the frame and engages the latch.
1.Locate the latch valve (often marked with an "L")
2.Turn clockwise to slow the latching speed
3.Turn counterclockwise to increase it
4.Again, make small adjustments and test frequently
The latch speed should be slightly faster than the sweep speed to ensure the door closes completely. However, it shouldn't slam. A good latch speed allows the door to close firmly but gently.
After adjusting both valves, test the door multiple times. Open it to different angles—fully open, halfway, and just slightly—to ensure it closes properly from every position. If the door still isn't performing as expected, make additional micro-adjustments.
If your closer has a backcheck valve, you can also adjust this to prevent the door from swinging open too forcefully. Turn it clockwise to increase resistance when opening.

If your door closer won't hold the door open (and it's supposed to), check if it has a hold-open feature. Some UL door closers include a friction hold-open or magnetic hold-open function. Consult your closer's manual to see if this feature exists and how to activate it.
This usually means the sweep or latch speed is too fast. Slow down both valves by turning them clockwise in small increments until the door closes smoothly.
This indicates the latch speed is too slow. Turn the latch valve counterclockwise to speed it up. You may also need to check that the door isn't rubbing against the frame or carpet, which can slow it down.
If you notice oil around the closer, stop adjusting immediately. A leaking closer often means the seals are damaged and the unit may need to be replaced. Leaking fluid will eventually cause the closer to stop working altogether.
Regular maintenance can extend the life of your door closer and keep it functioning smoothly:
· Check the adjustment screws every few months to ensure they haven't loosened
· Clean the closer body to prevent dirt and debris from interfering with the mechanism
· Lubricate the arm joints with a light machine oil if they appear stiff
· Inspect for leaks regularly, especially if the closer is exposed to extreme temperatures
With proper care, a quality UL door closer can last 10-15 years or more.
While adjusting a UL door closer is straightforward, there are times when professional help is needed:
· The closer is leaking hydraulic fluid
· Adjustment valves are stripped or damaged
· The door closer arm is bent or broken
· The door still won't close properly after multiple adjustments
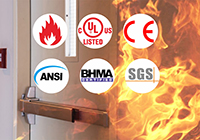
Fire-rated doors and commercial applications may also require inspection by a certified professional to maintain compliance with building codes.
Adjusting an overhead UL door closer is a simple DIY task that can save you time and money. By understanding how the sweep and latch valves work, you can fine-tune your door closer to perform exactly as needed. Remember to make small adjustments, test frequently, and check for leaks or damage during the process.
Whether you're dealing with a door that slams or one that won't latch, these steps will help you restore smooth, controlled operation. Keep your closer well-maintained, and it will serve you reliably for years to come.
For further information about fire rated door closer or any of our services, please click to Contact us Now:
Contact: David Jian
Mobile No.: 0086-139 2903 7292
Email: sales@danddhardware.com