Views: 0 Author: Site Editor Publish Time: 2025-02-26 Origin: Site


Looking for a clean, seamless look for your doors? Hidden hinges are the answer. Unlike traditional hinges, hidden hinges for doors are concealed within the frame, providing a sleek and modern appearance. Whether you're remodeling an old space or starting fresh, learning how to install hidden hinges is an essential skill for achieving a minimalist, polished look.
This step-by-step guide will walk you through the process of installing hidden hinges, ensuring your project is smooth and stress-free.
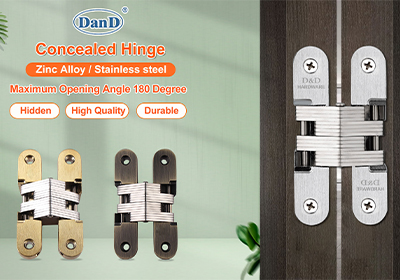
Before we get started, let's quickly cover the basics. Hidden hinges, also known as concealed hinges or European hinges, are a type of hinge installed inside the door and frame. Once installed, they are completely invisible when the door is closed.
These hinges are commonly used in modern interior design and are popular for applications like closet doors, cabinets, and even heavy-duty doors where aesthetics and functionality go hand in hand.
· Sleek Design: Hidden hinges eliminate the bulky appearance of traditional hinges, creating a modern, clean finish.
· Durability: Heavy-duty hidden hinges provide strength for larger or heavier doors.
· Smooth Operation: Many concealed hinges allow for easy adjustment and a smoother opening and closing motion.
Now that you know the "why," it’s time to focus on the "how."

Before you begin installing your hidden hinges, gather the following tools and materials to ensure a smooth installation process:
· Drill with appropriate drill bits
· Measuring tape
· Screwdriver (manual or electric)
· Pencil or marker
· Chisel (if necessary for modifications)
· Router (optional, for more precise work)

· Hidden hinges designed for your door type (make sure they're rated for the door’s weight)
· Screws (usually provided with the hinge)
· Door and frame where installation will take place
Pro Tip: Always double-check that your hinges are heavy-duty hidden hinges if you're installing them on large or heavy doors. Using the wrong type of hinge could cause structural issues over time.
Follow these steps to install your hidden door hinges like a pro.
· Read the Manufacturer's Instructions: Every hinge model can differ slightly. Start by reading the instructions included with your hidden hinges for doors to avoid mistakes.
· Measure and Mark: Use a measuring tape to mark where the hinges will be placed on the door. Standard placements are typically 7 inches from the top and bottom edges and, depending on your door’s height, one in the middle.
· Check Clearance: Ensure the door will close and open without obstruction.
Using a pencil or marker, trace the outline of the hinge template onto the door and the door frame. Most hidden hinges come with a tracing template to ensure accurate placement.
Creating pockets is essential for recessed hinges. These pockets will allow the hinges to sit flush within the door and frame.
If you have a router, use it to carve out the area within the traced hinge outline. For those without a router, carefully use a chisel to carve out the pocket. Be sure to make the pocket deep enough to fit the hinge but not so deep that it affects the strength of the door.
· Insert the hidden hinge into the recess you created on the door.
· Use the provided screws to attach the hinge securely to the door. Ensure a tight fit and double-check that the hinge is level.
P Tip: Avoid over-tightening the screws as this could break or warp the hinge.
· Align the door with the frame.
· Carefully position the hinge recesses on the door frame and repeat the process to attach the other side of the hinge to the frame.
Check to ensure the hinges are properly aligned before fully tightening the screws.
· Open and close the door to check the alignment and motion.
· Most hidden hinges feature adjustment screws for fine-tuning. Use these to make sure the door hangs perfectly straight and operates smoothly.
P Tip: When working with heavy-duty hidden hinges, have someone assist you in holding the door in place during installation to avoid any mishaps.
Even with the most meticulous planning, mistakes can happen. Here are a few common errors to watch out for when installing hidden hinges for doors and how to avoid them.
Misaligned hinges can affect the door's ability to open and close properly. Always measure twice before drilling or chiseling.
If you carve the pocket too deep, the hinge may not sit snugly, affecting the stability of the door. Use a depth guide when working with a router or chisel.
Not all hidden hinges are designed for every door type. Check the weight rating of your hinges, particularly for heavy doors.
Always pay attention to the unique features of your chosen hinges. Manufacturer guidelines often include helpful insights for a smoother installation process.

Whether you're designing modern interiors or aiming for a seamless look, hidden hinges are the perfect upgrade for your doors. While installing hidden hinges may seem intimidating at first, following these steps—and avoiding common mistakes—can give you professional-quality results.
With the right tools, materials, and a bit of patience, you’ll have doors that not only function flawlessly but look incredible too.
If you’re tackling heavy-duty projects or upgrading your entire home, invest in high-quality hinges to ensure strength and durability over time. Don’t hesitate to make sleek design choices—hidden hinges are always worth it in the end!
Contact: David Jian
Mob: +86-139 2903 7292
Email: sales@danddhardware.com