Views: 0 Author: D and D Hardware Publish Time: 2025-11-18 Origin: D and D Hardware


Self-closing door hinges are a simple yet clever solution for doors you never want left open, like the one leading from your garage into your home or a screen door to the backyard. They use a spring mechanism to automatically pull the door shut, offering convenience and a bit of extra safety. But what happens when the door slams too hard or doesn't close completely?
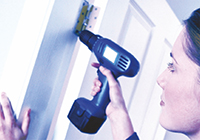
The good news is that you don't need to call a professional. Adjusting the tension on most self-closing door hinges is a straightforward task that you can tackle with just a few basic tools. Whether your door is closing with too much force or not quite latching, this guide will walk you through the process step-by-step. We'll cover the most common types of self-closing hinges and provide clear instructions to help you get your door swinging just right.
Before we get into the "how," let's quickly cover the "why." Adjusting the tension of your self-closing door hinges is important for a few reasons:
· Safety: A door that slams shut can be a hazard, especially for small children or pets. It can pinch fingers or cause injury.
· Noise Reduction: A constantly slamming door is simply annoying. Proper adjustment ensures a firm but quiet close.
· Proper Latching: A door that doesn’t close all the way fails to do its job. It won't lock properly, and it can let in drafts, insects, or compromise your home's security.
· Preventing Damage: A door that repeatedly slams with excessive force can damage the door frame, the latch mechanism, and the hinge itself over time.

The tools required for this job are simple, and you likely already have them in your toolbox. The exact tool depends on the type of hinge you have, but here’s a general list:
· Allen wrench (or hex key): This is the most common tool for adjusting modern self-closing hinges. Many hinges come with the correct size.
· Adjustment rod or pin: Some older hinge models use a small steel rod to adjust tension.
· Flathead screwdriver: You might need this to remove a cap or plug covering the adjustment mechanism.
· Safety glasses: It's always a good practice to protect your eyes when working with tensioned springs.
· Ladder or step stool: For reaching the top hinge if needed.
The first step is to figure out what kind of self-closing hinge you're working with. Most residential doors use one of two main types.
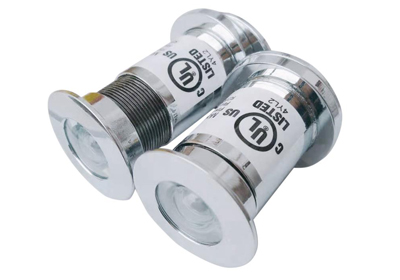
This type is very common. You'll see a series of small holes arranged in a circle at one end of the hinge barrel (the cylindrical part). There will also be a tiny pin, called a locking pin, inserted into one of these holes. This pin holds the internal spring at a certain tension.
Newer self-closing door hinges often have a more streamlined design. At the top or bottom of the hinge barrel, you'll find a small hexagonal opening designed for an Allen wrench (hex key). Turning the wrench adjusts the spring's tension directly. Sometimes this hex opening is covered by a small cap that you'll need to pry off with a screwdriver.

Once you've identified your hinge type, you're ready to make adjustments. It's best to adjust one hinge at a time, usually starting with the top one, as it often does the most work.
This process involves removing the locking pin, turning the tension collar, and re-inserting the pin into a different hole.
1.Close the Door: Start with the door fully closed. This releases the tension on the spring, making it easier and safer to work with.
2.Insert the Adjustment Rod: Take the adjustment rod or a sturdy nail that fits snugly into the holes. Insert it into an empty hole next to the one with the locking pin.
3.Apply Pressure to Release the Pin: Push the adjustment rod in the direction the door opens (usually clockwise). This will turn the tension collar slightly, relieving the pressure on the locking pin.
4.Remove the Locking Pin: While holding the rod in place, use your fingers or a pair of needle-nose pliers to pull out the locking pin. Be careful, as the spring is under tension.
5.Adjust the Tension:
· To increase tension (make the door close faster/harder): Turn the adjustment rod clockwise to the next hole and re-insert the locking pin.
· To decrease tension (make the door close slower/softer): Turn the adjustment rod counter-clockwise to the next hole and re-insert the locking pin.
6.Test the Door: Remove the adjustment rod and open the door. Let it go and watch how it closes. If it's still not right, repeat the process, moving the pin one hole at a time until you're satisfied.
7.Repeat for Other Hinges: If your door has more than one self-closing hinge, adjust the others in the same way until the door closes smoothly and latches securely.
This method is often quicker and doesn't involve small pins that can be easily lost.
1.Locate the Adjustment Socket: Find the hex socket at the top or bottom of the hinge barrel. If there’s a protective cap, gently pry it off with a flathead screwdriver.
2.Insert the Allen Wrench: Place the correctly sized Allen wrench into the socket.
3.Adjust the Tension:
· To increase tension: Turn the Allen wrench clockwise. You will likely hear and feel a clicking sound as the internal ratchet mechanism engages. Each click represents an increase in tension.
· To decrease tension: Turn the Allen wrench counter-clockwise. With some models, you may need to turn it a full rotation counter-clockwise to release the tension completely, then re-tighten it to your desired level. Other models will click as you loosen them.
4.Test the Door: After a small adjustment (a quarter-turn or a few clicks), remove the wrench and test the door. Let it swing shut and observe its speed and whether it latches.
5.Fine-Tune the Adjustment: Continue making small adjustments until the door closes exactly how you want it.
6.Replace the Cap: Once you're done, remember to put the protective cap back on the hinge if it had one.

Sometimes you might run into issues. Here are a few common problems and how to solve them:
· The adjustment mechanism is stuck: Dirt, rust, or paint can jam the mechanism. Try spraying a small amount of lubricant like WD-40 into the adjustment area and let it sit for a few minutes before trying again.
· The spring is broken: If you've increased the tension to the maximum setting and the door still won’t close, the internal spring might be broken. Unfortunately, this isn't repairable, and you'll need to replace the entire hinge.
· The door is misaligned: Sometimes the problem isn't the hinge tension but the door itself. Check if the door is rubbing against the frame or the floor. If it is, no amount of hinge adjustment will fix it. You may need to tighten the screws on all the hinges or even reposition a hinge to fix the alignment.
Adjusting your self-closing door hinges is a simple DIY fix that makes a big difference. It eliminates the annoyance of a slamming door, ensures your home is secure by getting the door to latch properly, and enhances overall safety. By taking a few minutes to identify your hinge type and make a few small tweaks, you can have your doors operating perfectly.


For further information about door hinges or any of our services, please click to Contact us Now:
Contact: David Jian
Mobile No.: 0086-139 2903 7292
Email: sales@danddhardware.com