Views: 0 Author: D&D Hardware Publish Time: 2025-11-03 Origin: D&D HARDWARE


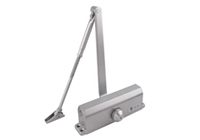
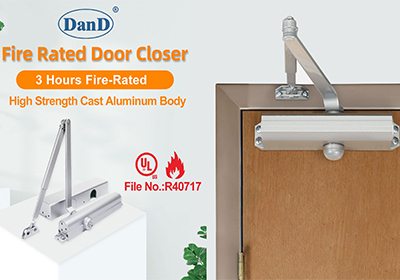
A door closer is a simple but essential piece of hardware. It ensures your door shuts smoothly and securely every time, controlling its speed and preventing it from slamming. The UL 63Z0 is a popular model known for its reliability, but like any mechanical device, it requires occasional adjustments to perform at its best.
If your door is closing too fast, too slowly, or not latching properly, a few simple tweaks to your UL door closer can solve the problem. This guide will walk you through the entire process, explaining what each adjustment screw does and how to fine-tune your closer for perfect operation. You'll learn how to adjust the swing speed, latching speed, and backcheck to customize the door's movement to your exact needs.

Before you grab your tools, it’s helpful to understand the basic components of your UL 63Z0 door closer. This device uses hydraulic fluid and a spring system to control the door's movement. By turning specific valves, you can regulate the flow of this fluid, which in turn changes the speed at which the door closes.
On the body of your UL door closer, you will find several small screws. These are the adjustment valves. Each one is typically labeled and controls a specific phase of the closing cycle:
· Swing Speed (S): This valve controls the main speed of the door as it closes from the fully open position to the last few inches.
· Latching Speed (L): This valve manages the final part of the closing cycle, the last 5 to 10 degrees of movement, ensuring the door clicks securely into the frame's latch.
· Backcheck (BC): This optional feature controls the opening swing, providing resistance to prevent the door from being thrown open too forcefully by wind or aggressive use. Not all models have this, but it’s common on the UL 63Z0.
You will also see a larger nut on the end of the closer body, which is used to adjust the spring power. This determines the overall force the closer exerts.
Adjusting your UL 63Z0 door closer is a straightforward task that doesn’t require specialized equipment. You will likely only need one or two common tools:
· A flathead screwdriver: This is for turning the small adjustment valves (S, L, and BC).
· An adjustable wrench: This is for turning the larger spring power adjustment nut.
Having a step ladder might also be necessary, depending on the height of the door. Always prioritize safety when working on any hardware.

Follow these instructions to fine-tune your door closer. Remember to make small, gradual adjustments—a quarter-turn of a screw can make a significant difference.
The swing speed is the main closing phase, covering the door’s travel from fully open until it’s about a foot away from the frame.
1.Locate the Swing Speed Valve (S): Look for the valve screw marked with an "S" on the side of the door closer body.
2.Make the Adjustment:
3.
· To slow the door down: Use your flathead screwdriver to turn the "S" screw clockwise. This restricts the hydraulic fluid, making the door close more slowly.
· To speed the door up: Turn the "S" screw counter-clockwise. This allows the fluid to flow more freely, making the door close faster.
4.Test the Door: Open the door fully and let it close on its own. Observe the speed and repeat the adjustment until you are satisfied. A good swing speed is typically around 5-7 seconds from 90 degrees open.
Important Note: Never turn the adjustment screws more than two full rotations counter-clockwise from their fully tightened position. Unscrewing them completely can cause the hydraulic fluid to leak, damaging the unit and creating a mess.
The latching speed controls the final few inches of the door's closure. This phase needs enough force to overcome the latch mechanism without slamming the door.
1.Locate the Latching Speed Valve (L): Find the valve screw marked with an "L," usually located next to the "S" valve.
2.Make the Adjustment:
3.
· To increase latching force (faster latch): Turn the "L" screw counter-clockwise. This is useful if your door isn't latching securely.
· To decrease latching force (slower latch): Turn the "L" screw clockwise. This will soften the final closure and prevent it from banging shut.
4.Test the Door: Open the door just a foot or so and let it go. Watch how it closes into the frame. Adjust the "L" valve until the door latches firmly but quietly.
Backcheck is a cushioning function that prevents the door from being flung open too quickly. It engages when the door is opened past approximately 75 degrees.
1.Locate the Backcheck Valve (BC): Find the valve screw marked with a "BC" on the closer.
2.Make the Adjustment:
3.
· To increase resistance: Turn the "BC" screw clockwise. This will make it harder to push the door open quickly past the 75-degree point.
· To decrease resistance: Turn the "BC" screw counter-clockwise. This will make the door easier to open wide.
4.Test the Door: Open the door forcefully to test the resistance. Adjust until you find a comfortable level of cushioning that protects the door and wall without making the door too difficult to open.
If adjusting the speed valves doesn't solve your problem, you may need to adjust the spring power. This is especially true if the door feels too heavy to open or doesn't have enough force to close against air pressure.
1.Locate the Spring Power Adjustment Nut: This is the large hex nut on one end of the closer tube.
2.Make the Adjustment: Use an adjustable wrench for this step.
3.
· To increase spring power: Turn the nut clockwise. This will make the door harder to open but give it more force to close.
· To decrease spring power: Turn the nut counter-clockwise. This will make the door easier to open.
4.Test the Door: After adjusting, test both the opening resistance and the closing cycle. You may need to readjust the swing and latching speeds after changing the spring power.

Once you have completed the initial adjustments, open and close the door several times to ensure it operates smoothly through its entire cycle. A perfectly adjusted door should close at a controlled, consistent speed and latch securely without slamming.
Properly maintaining your UL door closer not only improves convenience but also enhances the safety and longevity of your door and its hardware. By following these simple steps, you can ensure your UL 63Z0 performs flawlessly for years to come.
Contact: David Jian
Mob:0086-139 2903 7292
Email: sales@danddhardware.com