Views: 0 Author: D&D Hardware Publish Time: 2025-11-27 Origin: D&D HARDWARE


Installing a mortise lock is a rewarding DIY project that can significantly boost your home's security and curb appeal. Unlike standard cylindrical locks, a mortise door lock fits into a deep pocket—or mortise—cut into the edge of the door. This design makes them stronger and more resistant to forced entry. While the process requires precision and the right tools, it's a manageable task for a confident DIYer.
This guide will walk you through the entire process, from gathering your materials to making the final cuts. We'll provide step-by-step instructions to help you install a mortise lock set on an exterior door or an interior one, ensuring a professional and secure fit. By the end, you'll have the skills needed to tackle this project and enhance your door's functionality and style.

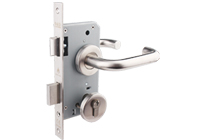
Before we begin cutting, it's helpful to understand what a mortise lock is and how it works. A mortise lock consists of a large, rectangular lock body that houses all the internal components: the latch, the deadbolt, and the locking mechanism. This entire body is installed inside a pocket cut into the edge of the door.
Because the lock body is fully integrated within the door itself, a mortise lock set for an exterior door offers superior strength compared to a standard bored cylindrical lock, which is only held in place by a few screws. They are often found on older homes but are increasingly popular in new construction for their durability and classic aesthetic.


Proper preparation is the key to a smooth installation. Rushing this stage can lead to mistakes that are difficult to correct. Take your time to gather your tools and mark your door accurately.
Having the right tools on hand will make the job much easier and safer. Here's what you'll need:
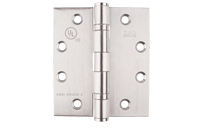
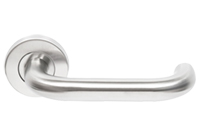
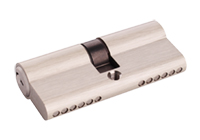
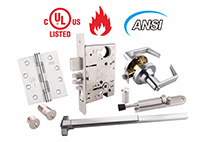
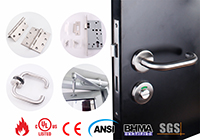
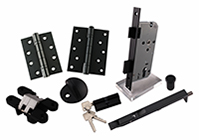
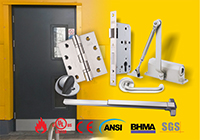
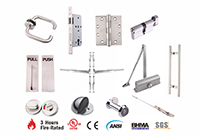
Mortise Lock Set: This includes the lock body, faceplate, strike plate, handles, and cylinder.
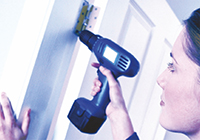
Power Drill: A reliable drill is essential for creating the main pocket.
Drill Bits: You'll need a spade bit or auger bit that matches the thickness of your lock body.
Chisels: A sharp set of wood chisels (1/4-inch and 1-inch are good sizes) is crucial for squaring off the mortise and cutting the faceplate recess.
Hammer or Mallet: To use with your chisels.
Tape Measure: For accurate measurements.
Combination Square: To ensure your lines are straight and square.
Pencil: For marking the door.
Utility Knife: For scoring your cut lines to prevent wood splitting.
Safety Goggles: To protect your eyes from wood chips and dust.
Accurate marking is the most critical part of the process. A mortise lock has several components that need to be precisely aligned.
Mark the Lock Body Position: Start by marking the center height for the lock on the edge of the door. A common height for a doorknob is 36 inches from the floor, but check your local building codes or personal preference. Use your combination square to draw a horizontal centerline on the door's edge.
Trace the Lock Body: Hold the mortise lock body against the edge of the door, centered on the line you just drew. Carefully trace its top and bottom onto the door's edge. Then, measure the thickness of the lock body and mark this on the door edge as well, ensuring it's centered. This rectangle you've drawn is where you will cut the main pocket.
Trace the Faceplate: Place the lock body on the face of the door, aligned with the marks on the edge. Trace the location for the keyhole and the spindle for the handle. Then, hold the faceplate on the edge of the door, centered over your lock body outline, and trace its perimeter. This shallow recess will allow the faceplate to sit flush with the door edge.

With your markings in place, it's time to start cutting. The goal is to create a clean, snug pocket for the lock body.
This is where the bulk of the wood is removed.
Set Your Drill Depth: Hold your drill bit next to the lock body and mark the depth of the mortise on the bit with a piece of tape. This prevents you from drilling too deep.
Drill a Series of Holes: Secure the door firmly on its edge. Using your spade or auger bit, drill a series of overlapping holes within the marked rectangle for the lock body. Drill slowly and keep the drill as straight as possible to ensure the pocket is perpendicular to the door edge. Remove as much material as you can with the drill.
The drill will leave a rough pocket with rounded edges. Now, you'll use a chisel to clean it up.
Square the Corners: Use your hammer and a sharp chisel to carefully remove the remaining wood. Work from the edges inward, making small, controlled cuts. The goal is to create a rectangular pocket with flat sides and square corners that matches the dimensions of your lock body.
Test the Fit: Periodically check the fit of the lock body. It should slide into the mortise snugly without being forced. If it's too tight, carefully chisel away small amounts of wood until it fits perfectly.
1
Once the main pocket is complete, you need to create the recesses for the faceplate and install the trim hardware.
The faceplate needs to sit flush with the door's edge for a clean, professional look.
Score the Outline: Using a sharp utility knife and a straightedge, carefully score the outline you traced for the faceplate. This will prevent the wood from splintering when you chisel.
Chisel the Recess: With a wide, sharp chisel, carefully remove the wood inside the scored outline. The depth should match the thickness of the faceplate. Work slowly, making shallow cuts to avoid going too deep. Test the fit of the faceplate until it sits perfectly flush.
Now, you'll drill the holes on the face of the door for the handles and lock cylinder.
Insert the Lock Body: Place the mortise lock body into the pocket.
Drill the Holes: Using the holes in the lock body as a guide, or based on the markings you made earlier, drill through the door for the handle spindle and the key cylinder. Choose a drill bit that is just slightly larger than the spindle and cylinder to allow for smooth operation.
The final step is to secure the lock and install the corresponding strike plate on the door jamb.
Install the Lock: Insert the lock body into the mortise and secure it with the provided screws through the faceplate. Install the handles and the lock cylinder.
Mark and Install the Strike Plate: Close the door and mark where the latch and deadbolt hit the door jamb. Use these marks to position the strike plate. Trace the outline of the strike plate and chisel a shallow recess for it, just as you did for the faceplate. Drill holes for the latch and deadbolt, then screw the strike plate into place.
1

Installing a mortise door lock is a project that combines woodworking with mechanical assembly, offering a satisfying challenge for any DIY enthusiast. By following these steps carefully and working with precision, you can add a high-quality, secure lock to your home that will last for decades. Remember to always prioritize safety by wearing goggles and using sharp tools correctly. With your new mortise lock in place, you can enjoy both enhanced security and the timeless elegance it brings to your doorway.
For further information about fire rated door mortise locks or any of our services, please click to Contact us Now:
Contact: David Jian
Mobile No.: 0086-139 2903 7292
Email: sales@danddhardware.com