Views: 0 Author: Site Editor Publish Time: 2025-11-21 Origin: Site


Self-closing door hinges are a convenient feature in many homes. They ensure doors shut securely, which is great for everything from keeping pets out of certain rooms to improving fire safety and energy efficiency. But what happens when the door slams shut too quickly or doesn't close with enough force? The solution is usually a simple adjustment.
Adjusting self-closing door hinges might seem like a complicated task reserved for a professional, but it's often a straightforward DIY project. With the right tools and a bit of patience, you can fine-tune the tension to get your door closing just right. This guide will walk you through the entire process, from identifying the type of hinge you have to making the final adjustments.
Before you start making adjustments, it’s helpful to understand what you're working with. Self-closing door hinges, also known as spring-loaded hinges, contain an internal spring mechanism. This spring stores energy when the door is opened and then releases that energy to automatically pull the door closed.
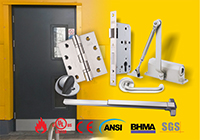
They are commonly found on garage entry doors, front doors, and fire-rated doors where a secure closure is necessary for safety and security. Unlike standard hinges, which simply pivot, these hinges have an adjustable tension setting that controls the speed and force of the closing action.
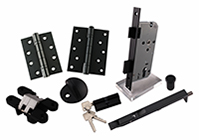
There are a few common types of self-closing hinges, and identifying yours is the first step toward a successful adjustment.
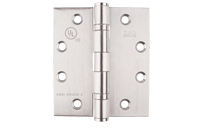
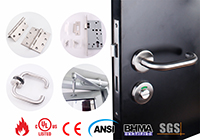
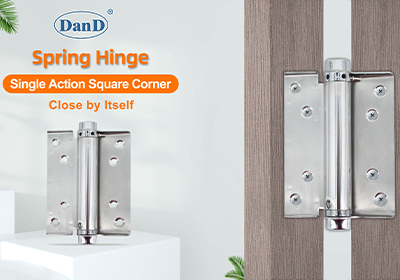
· Standard Spring Hinges: These look very similar to regular door hinges but have a larger, cylindrical barrel that houses the spring. They are adjusted using a tension pin and an Allen wrench.
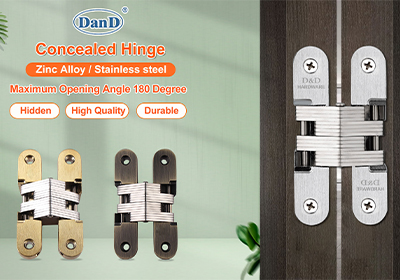
· Concealed Spring Hinges (European Style): Often found on cabinet doors, these hinges are hidden when the door is closed. Adjustments are typically made with screws located on the hinge body. While common in cabinetry, they are less so for full-sized interior or exterior doors.
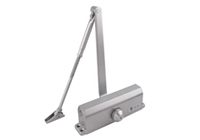
· Hydraulic Hinges: These are less common in residential settings and use hydraulic fluid to control the closing motion, offering a smoother, more controlled close. Their adjustment process is different and often more complex.
This guide will focus on the most common type found in homes: the standard spring hinge.
Gathering your tools before you begin will make the job much smoother. You won’t need much, and you likely already have these items in your toolbox.
· Allen Wrench (Hex Key): This is the most crucial tool. Most self-closing hinge kits come with the correct size Allen wrench. If you've lost it, a standard set of Allen wrenches should have the size you need.
· Tension Pin: This small metal rod is used to hold the tension while you adjust the hinge. It usually comes with the hinge. If you don't have it, a small nail or the smooth shank of a drill bit of a similar diameter can work as a substitute.
· Safety Goggles: The spring inside the hinge is under tension. It’s always a good idea to protect your eyes in case a tool slips or the pin releases unexpectedly.
· Step Ladder or Stool (if needed): For reaching the top hinge safely.
· A Helper (Optional but Recommended): An extra pair of hands can be very useful for holding the door steady, especially if you need to remove it completely.

Adjusting the tension on a self-closing hinge involves either tightening or loosening the internal spring. If your door is slamming shut, you need to loosen (decrease) the tension. If it’s not closing completely, you need to tighten (increase) it. Since our goal is to loosen the hinge, we'll focus on that process.
First, examine your door. A door with self-closing door hinges will typically have two standard hinges and one spring-loaded hinge, which is usually the one in the middle. However, some heavier doors might have two or even three spring hinges.
The adjustment hinge will have a small Allen keyhole (hexagonal socket) at the top of the barrel and a series of small holes encircling it. This is the tension adjustment mechanism.
Open the door to a position where it is stable and you can comfortably work on the hinge. Having a doorstop or asking a helper to hold the door can prevent it from moving while you work. Close the door fully to see how fast it closes. This gives you a baseline before you start making changes.
Insert the correctly sized Allen wrench into the hexagonal socket at the top of the hinge barrel. You need to ensure it's fully seated to avoid stripping the socket.
This is the most critical part of the process. The spring is under pressure, so proceed carefully.
1.Turn the Allen wrench slightly in the direction that tightens the spring (usually clockwise, but it can vary). This will take the pressure off the tension pin that's currently holding the spring in place.
2.While holding the Allen wrench steady, use your other hand to remove the tension pin from one of the small holes around the socket. It should come out easily. If it's stuck, you may need to apply a bit more pressure with the Allen wrench.
3.Once the pin is out, slowly and carefully allow the Allen wrench to turn counter-clockwise. You will feel the spring's tension unwinding. Do not let go of the wrench; guide it back slowly until the tension is fully released.
Now that the old tension setting is released, you can set a new, looser one.
1.Turn the Allen wrench clockwise again, but this time only enough to reveal the first adjustment hole.
2.Insert the tension pin into this hole. This sets the hinge to its lowest tension setting.
3.Slowly release the pressure on the Allen wrench, allowing the pin to take the full force of the spring. Remove the Allen wrench.
Gently close the door and then open it again to test the new setting. Let it go and watch how it closes.
· If it still closes too fast, you may have more than one spring-loaded hinge on the door. You will need to repeat the loosening process on the other spring hinge(s). Reduce the tension on each hinge one by one until the door closes at the desired speed.
· If the door now closes too slowly or doesn't latch, you have loosened it too much. You will need to add a bit of tension back. To do this, re-insert the Allen wrench, turn it clockwise to the next hole, remove the pin, let the wrench rotate to the new position, and re-insert the pin into that hole.
Continue this process of minor adjustments and testing until you achieve the perfect closing speed—a smooth, controlled close that ends with a secure latch without slamming.
Sometimes things don't go as planned. Here are a few common problems you might encounter and how to fix them.
· The Allen Wrench Doesn't Fit: You might be using the wrong size. Try a different key from your set. Hinge manufacturers can use either metric or imperial sizes.
· The Tension Pin is Stuck: The spring might still be putting too much pressure on it. Try turning the Allen wrench a little further in the tightening direction to fully relieve the pressure.
· The Hinge is Noisy: A squeaking or grinding noise may mean the hinge needs lubrication. Apply a silicone-based spray lubricant inside the hinge mechanism while opening and closing the door a few times.
· The Door Still Slams on the Lowest Setting: If you have multiple spring hinges and have set them all to the minimum tension, but the door still slams, the springs might be too strong for the weight of your door. In this rare case, you might consider replacing one of the spring hinges with a standard hinge.
Adjusting self-closing door hinges is a simple task that can make a big difference in your home. By following these steps, you can eliminate a slamming door and create a quieter, more pleasant environment. Remember to always prioritize safety by wearing protective eyewear and working slowly and deliberately. With a little bit of effort, you'll have your door closing perfectly in no time.